 Introduction:
Installing a kitchen sink can be a rewarding and practical DIY project that can transform the look and functionality of your kitchen. Whether you’re replacing an old sink or installing a new one, understanding the installation process is essential for a successful outcome. In this article, we will provide you with a comprehensive step-by-step guide on how to install a kitchen sink. From gathering the necessary tools and materials to connecting the plumbing, let’s delve into the world of kitchen sink installation and take your kitchen to the next level.
 Some common types of kitchen sinks:
There are various types of kitchen sinks available, each designed to meet different functional and design preferences. Here are some common types of kitchen sinks:
Top Mount/ Drop-In Sink:
Top mount sinks, also known as drop-in sinks, are installed from the top and rest on the countertop. The sink’s rim sits on top of the counter while the bowl is positioned below. These sinks are easy to install and common in many kitchens.
Undermount Sink:
Undermount sinks are installed beneath the countertop, creating a seamless and sleek appearance. The edge of the countertop is exposed, and the sink bowl hangs underneath. Undermount sinks are popular for their clean look and easy cleaning, but they require professional installation.
Farmhouse/Apron Front Sink:
Farmhouse sinks, also called apron front sinks, have a large, exposed front panel that extends beyond the edge of the countertop. They offer a rustic, country-style look and are known for their deep, spacious bowls. Farmhouse sinks can be either top mount or undermount.
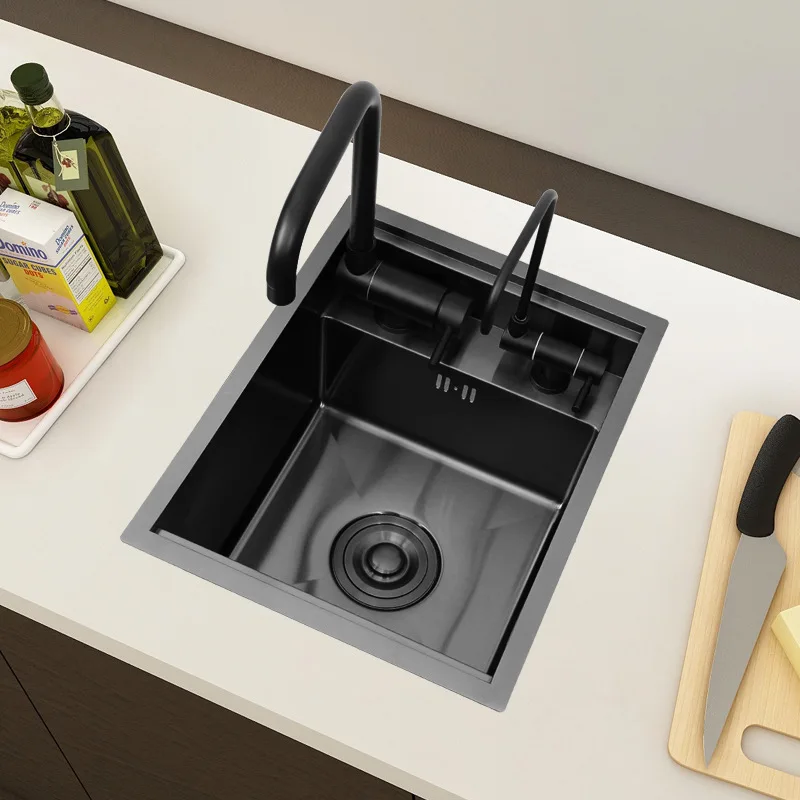
Stainless Steel Sink:
Stainless steel sinks are widely used due to their durability, resistance to stains, and ease of maintenance. They are available in various configurations, from single to double bowls, and complement a range of kitchen styles.
Composite Sink:
Composite sinks are made from a combination of materials such as quartz, granite, or acrylic resins. They offer durability, heat resistance, and come in different color options. Composite sinks are known for their modern and sleek appearance.
Cast Iron Sink:
Cast iron sinks are coated with a layer of enamel, creating a smooth and glossy surface. They are heavy-duty and resistant to chipping, scratching, and staining. Cast iron sinks are available in various colors and styles.
Fireclay Sink:
Fireclay sinks are made from a mixture of clay and glaze that is fired at high temperatures. They have a smooth, glossy finish and are known for their durability and resistance to stains and scratches. Fireclay sinks provide a classic and elegant look to the kitchen.
Each type of kitchen sink has its own advantages, and the choice depends on factors such as style preferences, functionality, durability, and budget. It’s important to consider these factors and consult with professionals when selecting the most appropriate kitchen sink for your needs.
Introduction to Kitchen Sink Installation
Installing a kitchen sink requires careful planning, preparation, and attention to detail.
A. DIY Opportunity: Installing a kitchen sink can be a rewarding do-it-yourself project that allows you to customize your kitchen to your liking.
B. Functionality and Aesthetics: A properly installed kitchen sink enhances functionality and aesthetic appeal, providing a practical workspace and elevating the overall look of your kitchen.
C. Considerations for Sink Types: Different sink types, such as top-mount, undermount, or farmhouse sinks, may have specific installation requirements to ensure proper fit and functionality.
 Gathering the Necessary Tools and Materials
Before starting the installation process, gather the essential tools and materials to ensure a smooth and successful project.
A. Tools Required: Prepare a wrench, screwdriver, utility knife, adjustable pliers, measuring tape, silicone caulk, and a bucket for collecting water.
B. Sink Installation Kit: Acquire a sink installation kit that includes mounting brackets, hardware, and any additional components necessary for the specific sink type you are installing.
C. Plumbing Supplies: Ensure you have the necessary plumbing supplies, such as water supply lines, a P-trap, and PVC piping, to connect the sink to the plumbing system.
Removing the Old Sink
If you’re replacing an existing sink, the first step is to remove the old sink and disconnect the plumbing.
A. Turn off the Water Supply: Locate the water shut-off valves under the sink and turn them off to stop the water supply.
B. Disconnect Plumbing Connections: Use a wrench or pliers to disconnect the water supply lines, drainpipe, and any other plumbing connections attached to the sink.
C. Remove Sink Clips or Brackets: If applicable, remove any sink clips or brackets securing the sink to the countertop.
Preparing the Sink and Countertop
Preparation is key to ensure a proper fit and secure installation of the new sink.
A. Measure the Opening: Measure the dimensions of the sink opening in the countertop to ensure the new sink will fit properly.
B. Cut or Modify Countertop if Necessary: If the new sink requires a larger opening, use a utility knife or a jigsaw to carefully cut or modify the countertop to match the sink’s dimensions.
C. Apply Silicone Caulk: Apply a thin bead of silicone caulk around the edges of the sink opening to create a watertight seal between the sink and the countertop.
Installing the New Sink
Now it’s time to install the new sink in the prepared opening.
A. Position the Sink: Carefully place the sink into the opening, ensuring it is aligned properly and centered.
B. Secure the Sink: Depending on the sink type, use mounting brackets or clips included in the installation kit to secure the sink to the underside of the countertop.
C. Connect Water Supply Lines: Attach the water supply lines to the corresponding hot and cold water inlets on the underside of the sink, making sure to tighten the connections securely.
 Connecting the Plumbing
Completing the plumbing connections is essential for the proper functioning of the sink.
A. Install the P-Trap: Connect the P-trap to the drain outlet on the sink using slip nuts and washers. Adjust the P-trap to align with the existing drainpipe, and secure the connections tightly.
B. Connect the Drainpipe: Attach the other end of the P-trap to the existing drainpipe using appropriate fittings and hardware. Ensure all connections are secure and properly aligned.
C. Check for Leaks: Turn on the water supply and carefully inspect all connections for leaks. Tighten any connections as needed to prevent leaks.
Testing and Finalizing Installation
The final steps involve testing the sink and ensuring everything is functioning properly.
A. Run Water: Turn on the water supply and run water in the sink to check for leaks and ensure proper drainage.
B. Check Operation: Test the operation of the sink by filling it with water and observing the flow and drainage. Ensure the sink plug operates smoothly if applicable.
C. Cleanup: Clean up the area and remove any debris or leftover materials from the installation process. Wipe down the sink and surrounding countertops to ensure a clean finish.
 Conclusion
Installing a kitchen sink can be a satisfying and practical DIY project that enhances the functionality and aesthetics of your kitchen. By following the step-by-step guide and gathering the necessary tools and materials, you can successfully install a new sink or replace an old one. Remember to measure carefully, prepare the sink and countertop, and make proper plumbing connections to ensure a secure and functional installation. With proper planning and attention to detail, you can enjoy a beautiful and fully functional kitchen sink that meets your needs and enhances your daily kitchen activities.