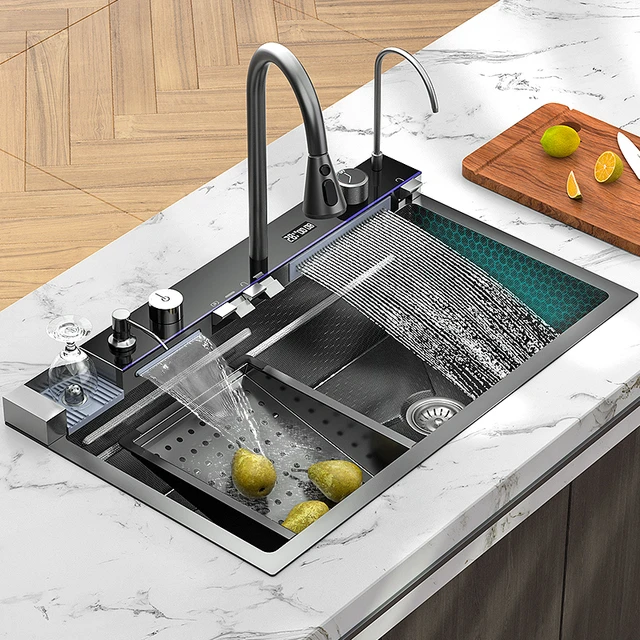
How to change kitchen sink
Replacing a kitchen sink can seem like a daunting task, but with the right tools, materials, and a clear step-by-step guide, it becomes manageable. This comprehensive guide will walk you through the entire process of changing a kitchen sink, from preparation to installation. Whether you’re upgrading for aesthetics or functionality, we’ve got you covered.
 Some common materials:
Stainless Steel
Pros: Durable, resistant to heat and stains, easy to clean.
Cons: Can scratch and show water spots, may be noisy.
Porcelain (or Ceramic)
Pros: Classic look, available in various colors, resistant to staining.
Cons: Can chip or crack, heavier than some other materials.
Granite Composite
Pros: Very durable, scratch and stain-resistant, available in various colors.
Cons: Can be heavy, may require special cleaning products.
Cast Iron
Pros: Extremely durable, often coated with enamel for a glossy finish, resistant to heat and stains.
Cons: Very heavy, can chip if hit with heavy objects, typically more expensive.
Copper
Pros: Unique and attractive look, natural antibacterial properties.
Cons: Requires regular maintenance, can patina over time, expensive.
Fireclay
Pros: Durable, resistant to scratches and stains, has a classic, high-end look.
Cons: Can be expensive, heavy, may require special installation.
Acrylic
Pros: Lightweight, inexpensive, available in numerous colors.
Cons: Less durable, prone to scratching and staining, can be damaged by heat.
Quartz Composite
Pros: Durable, scratch-resistant, comes in various colors.
Cons: Can be expensive, may crack under heavy impact, requires regular maintenance.
Solid Surface
Pros: Seamless appearance with integrated countertops, available in various colors.
Cons: Can be prone to scratching and staining, not as heat-resistant.
The choice of kitchen sink material depends on your specific needs, preferences, and budget. Stainless steel and granite composite are popular for their durability, while materials like porcelain and fireclay offer a more traditional or high-end look.
 Tools and Materials Needed
How to change kitchen sink
Essential Tools
- Adjustable wrench
- Basin wrench
- Screwdrivers
- Putty knife
- Utility knife
- Tape measure
- Plumber’s tape (Teflon tape)
- Pipe wrench
Materials
- New kitchen sink
- New faucet (if replacing)
- Plumber’s putty
- Silicone sealant
- Supply lines (if needed)
- Strainer and drain assembly
- Bucket or container (for catching water)
- Towels or rags (for cleanup)
Preparing for Installation
Turn Off the Water Supply
Locate Valves: Find the water shutoff valves under the sink. They are usually located at the back of the cabinet.
Turn Off Valves: Turn the valves clockwise to close them and shut off the water supply to the sink.
Relieve Pressure: Open the faucet to relieve any remaining water pressure in the lines.
Disconnect Plumbing
Drain the Pipes: Place a bucket under the sink to catch any water in the pipes.
Remove Supply Lines: Use an adjustable wrench to disconnect the water supply lines from the faucet.
Disconnect Drain Pipe: Loosen the nuts connecting the drainpipe to the sink strainer using a pipe wrench. Have a bucket ready to catch any water that may spill out.
Remove the Old Sink
Remove Clips: If the sink is held in place with mounting clips, use a screwdriver or wrench to remove them.
Cut Sealant: Use a utility knife to cut through the old silicone sealant around the edge of the sink.
Lift Out the Sink: Carefully lift the old sink out of the countertop. You may need assistance if the sink is particularly large or heavy.
Clean Area: Clean the area where the sink was installed, removing any old putty or sealant.
Installing the New Sink
How to change kitchen sink
Measure and Adjust Cutout (If Needed)
Measure the New Sink: Measure the dimensions of the new sink and compare them to the cutout in the countertop.
Adjust Cutout: If the new sink is larger, you may need to adjust the cutout using a jigsaw. Be sure to mark the exact dimensions and cut carefully.
Install the Faucet and Strainer
Attach Faucet: It is often easier to install the faucet on the sink before placing the sink in the countertop. Follow the manufacturer’s instructions to attach the faucet to the sink.
Apply Plumber’s Putty: Roll plumber’s putty into a snake-like shape and apply it around the underside of the sink strainer.
Insert Strainer: Insert the strainer into the sink’s drain hole and press down firmly.
Secure Strainer: From under the sink, place a rubber gasket and metal locknut onto the strainer threads. Tighten the locknut to secure the strainer in place.
Setting the Sink in Place
Apply Silicone Sealant: Apply a bead of silicone sealant around the edge of the sink cutout.
Place the Sink: Carefully lower the sink into the cutout. Ensure it is properly aligned and press down firmly to set it into the sealant.
Secure Sink: If the sink uses mounting clips, attach them from underneath to secure the sink to the countertop.
Connect Plumbing
Reattach Drain Pipe: Reattach the drain pipe to the sink strainer and tighten the nuts using a pipe wrench.
Reconnect Supply Lines: Connect the water supply lines to the faucet. Use plumber’s tape on the threads to ensure a secure fit.
Check for Leaks
Turn on Water Supply: Turn the water supply back on at the shutoff valves.
Test Faucet and Drain: Turn on the faucet and check for leaks around the supply line connections and the drain pipe. Tighten any connections if necessary.
Inspect Seal: Check around the edge of the sink for any gaps or leaks in the silicone sealant. Add more sealant if needed.
 Finishing Touches
Clean Up
Remove Excess Sealant: Use a utility knife or putty knife to carefully remove any excess sealant around the edge of the sink.
Wipe Down: Clean the sink and countertop to remove any remaining dust or debris from the installation process.
Final Inspections
Check Stability: Ensure that the sink is securely in place and does not move.
Test Functionality: Test the faucet, sprayer (if applicable), and drain to ensure everything is functioning correctly.
 Maintain Your New Sink
Regular Cleaning: Keep your sink clean by regularly wiping it down with a non-abrasive cleaner.
Avoid Harsh Chemicals: Use mild cleaning agents to avoid damaging the sink’s surface.
Check Sealant: Periodically check the sealant around the sink to ensure it remains intact and reapply as necessary.
Troubleshooting Common Issues
Leaking Connections: If you notice water leaking from connections, ensure all nuts are securely tightened and use plumber’s tape on threaded connections.
Slow Drain: If the sink drains slowly, ensure there are no blockages in the drain pipe and that the strainer is securely in place.
Unstable Sink: If the sink moves or feels loose, check the mounting clips and ensure they are properly tightened.
Inconsistent Water Flow: If the water flow from the new faucet is inconsistent, check the supply lines for kinks and ensure the aerator is not clogged.
Tips and Tricks for a Smooth Installation
How to change kitchen sink
Have a Helper: Having someone to assist you can make the process easier, especially when lifting and positioning the sink.
Double Check Measurements: Ensure all measurements are accurate before making cuts or purchasing a sink to avoid fitting issues.
Follow Instructions: Always follow the manufacturer’s instructions specific to your new sink and faucet for best results.
Be Patient: Take your time with each step to ensure a proper and secure installation, minimizing the risk of future issues.
 Conclusion
Changing a kitchen sink can breathe new life into your kitchen space, enhancing both functionality and aesthetics. By following this comprehensive guide, you can confidently tackle the task of replacing your kitchen sink. Remember to take your time, follow each step carefully, and don’t hesitate to seek assistance if needed. With the right tools and approach, you’ll have your new sink installed and ready to use in no time. Happy plumbing!