Installing a kitchen sink drain may seem like a daunting task, but with the right tools and a step-by-step guide, it can be a straightforward DIY project. This comprehensive guide will walk you through the entire process, from understanding the components of a kitchen sink drain to troubleshooting common issues. By the end of this guide, you’ll have the knowledge and confidence to install a kitchen sink drain effectively and efficiently.
 Various types:
Kitchen sink drains come in various types, each designed to serve specific needs and preferences. Here are some common types of kitchen sink drains along with simple descriptions:
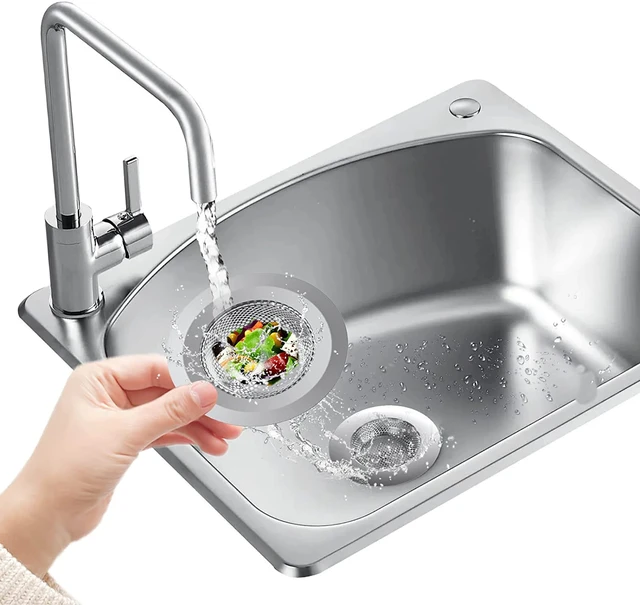
1. Standard Basket Strainer
Description: The most common type of sink drain, consisting of a perforated basket that fits into the drain opening.
- Pros: Simple and effective at catching food particles, easy to remove and clean, widely available.
- Cons: Needs to be regularly emptied to prevent clogging, may not catch all smaller debris.
2. Three-Post Basket Strainer
Description: A variation of the standard basket strainer with three posts that make it easier to lift out the basket.
- Pros: Easy to remove and clean, effective at catching debris, slightly more convenient than standard basket strainers.
- Cons: Similar maintenance required as standard strainers, can wear out over time.
3. Lift-and-Twist Basket Strainer
Description: Features a mechanism that allows you to lift and twist the basket to lock it in place for draining or sealing.
- Pros: Dual functionality allows for draining or sealing the sink, more control over water flow.
- Cons: Slightly more complicated to use, parts may wear out over time.
4. Flip-It Basket Strainer
Description: Utilizes a flip mechanism to open and close the drain.
- Pros: Easy to operate, prevents debris from entering the drain when closed, simple to clean.
- Cons: Mechanism can wear out over time, may be less durable than some other options.
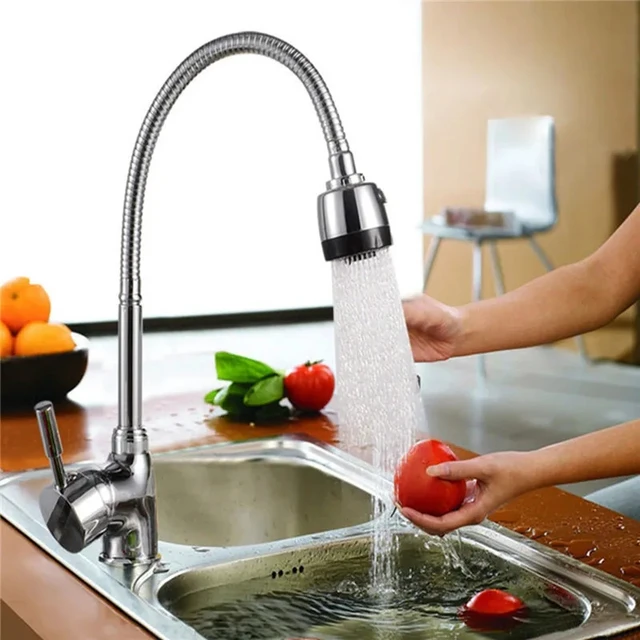
5. Pop-Up Drain
Description: Operated by a lever or knob that raises and lowers a stopper to seal or open the drain.
- Pros: Convenient and easy to operate, integrated design offers a sleek look, can be sealed to fill the sink with water.
- Cons: Moving parts can fail or need adjustment, slightly more complicated installation.
6. Garbage Disposal Drain
Description: Designed specifically to accommodate a garbage disposal unit.
- Pros: Facilitates the use of a garbage disposal to grind up food waste, reduces the risk of clogging.
- Cons: Requires a garbage disposal unit, generally more expensive, can be noisy.
 Understanding the Components of a Kitchen Sink Drain
Main Components
Sink Strainer: The sink strainer fits into the drain opening and helps catch debris. It often includes a basket that sits in the strainer body.
Rubber Gasket: The rubber gasket provides a watertight seal between the sink strainer and the sink basin.
Cardboard Friction Ring: This ring helps distribute the pressure evenly when you tighten the sink strainer.
Locknut: The locknut secures the sink strainer in place from underneath the sink.
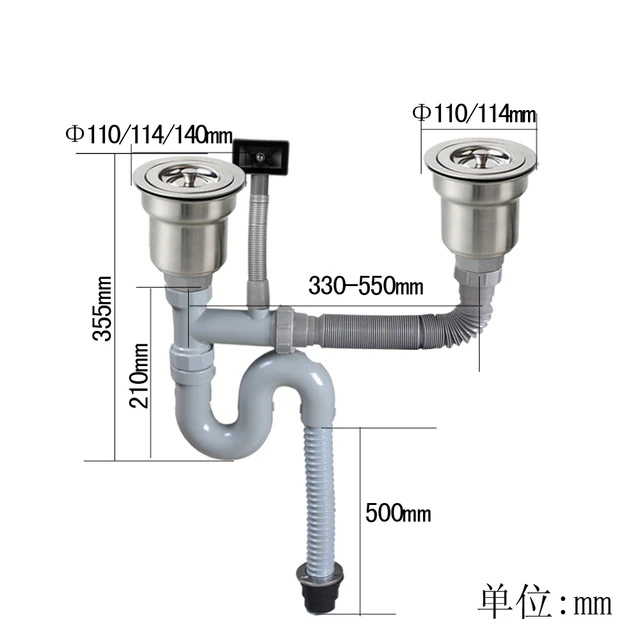
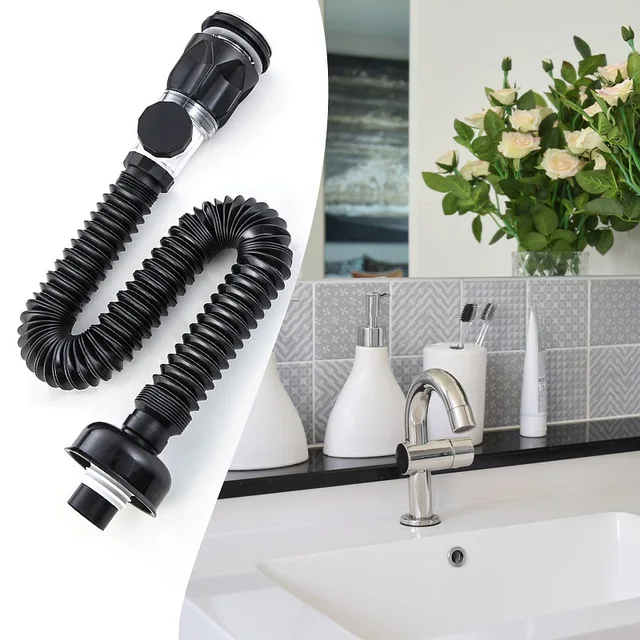
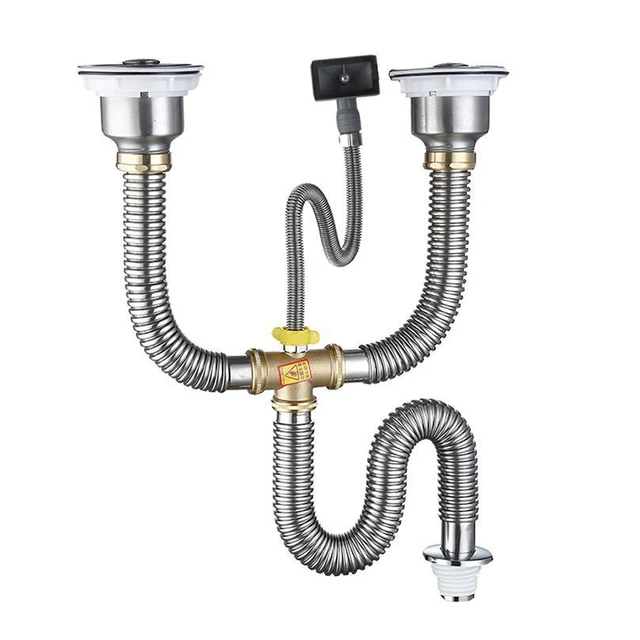
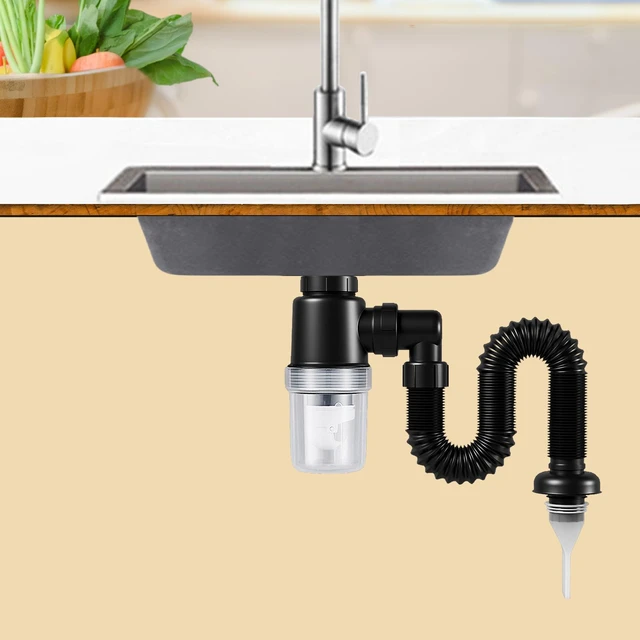
Tailpiece: A vertical pipe that connects the sink strainer to the rest of the plumbing system.
P-Trap: A U-shaped pipe that traps debris and prevents sewer gases from entering your kitchen.
Extension Tube: If needed, an extension tube connects the P-trap to the wall drain.
Optional Components
Dishwasher Drain Connection: An adaptor that allows the dishwasher to drain into the sink plumbing.
Garbage Disposal: A motorized unit that grinds food waste, typically installed directly underneath the sink drain.
Tools and Materials Needed
Tools
Wrench: To tighten and loosen nuts.
Plumber’s Putty: To create watertight seals.
Screwdriver: To secure clamps and other components.
Bucket: To catch any water that may spill during the installation.
Materials
Sink Strainer Kit: Includes the strainer, gaskets, friction ring, and locknut.
Plumbing Pipes: Tailpiece, P-trap, and any necessary extension tubes.
Teflon Tape: To ensure watertight seals on threaded connections.
PVC Primer and Cement: For gluing PVC pipes together, if applicable.
Preparation Before Installation
Ensure Proper Fit
Check Measurements: Measure your existing plumbing and new sink components to ensure compatibility.
Dry Fit: Temporarily assemble the parts to confirm that everything fits together properly before applying any sealants or adhesives.
Shut Off Water Supply
Locate Valves: Find the hot and cold water supply valves underneath your sink.
Turn Off Valves: Turn off both valves to prevent water flow during installation.
Drain Excess Water: Place a bucket under the sink to catch any residual water when you disconnect the old drain.
 Step-by-Step Guide to Installing a Kitchen Sink Drain
Removing the Old Drain
- Loosen the Locknut: Use a wrench to loosen the locknut underneath the sink, securing the old strainer in place.
- Remove the Strainer: Lift the old strainer out of the sink.
- Clean the Sink: Thoroughly clean the drain opening to remove any old plumber’s putty or debris.
Installing the New Sink Strainer
- Apply Plumber’s Putty: Roll a small amount of plumber’s putty into a rope shape and apply it around the edge of the new sink strainer.
- Insert the Strainer: Press the sink strainer firmly into the drain opening.
- Place Rubber Gasket and Friction Ring: From underneath the sink, slide the rubber gasket and cardboard friction ring onto the strainer body.
- Tighten the Locknut: Screw the locknut onto the strainer body and tighten it with a wrench, ensuring the strainer is secure.
Connecting the Tailpiece
- Attach the Tailpiece: Screw the tailpiece onto the bottom of the sink strainer, wrapping Teflon tape around the threads for a secure seal.
- Ensure Alignment: Make sure the tailpiece aligns with the rest of the plumbing underneath the sink.
Installing the P-Trap
- Assemble the P-Trap: Attach the curved part of the P-trap to the tailpiece, ensuring it’s pointing toward the wall drain.
- Attach the Extension Tube: If necessary, connect an extension tube to reach the wall drain.
- Secure Connections: Use slip nuts and washers to secure all connections, and tighten them with a wrench.
Optional Garbage Disposal Installation
- Mount the Disposal Unit: Follow the manufacturer’s instructions to mount the garbage disposal unit to the sink drain.
- Connect the Disposal: Attach the discharge pipe from the disposal to the plumbing system using a T-connector.
- Secure Electrical Connections: Make any necessary electrical connections, ensuring the power supply is turned off.
Testing the Installation
- Turn On Water Supply: Turn the hot and cold water supply valves back on.
- Run Water: Run water through the sink to check for leaks.
- Check for Leaks: Inspect all connections, including the sink strainer, tailpiece, P-trap, and any optional components, for any signs of leakage.
- Tighten as Necessary: If you find any leaks, tighten the connections and reapply Teflon tape or plumber’s putty as needed.
 Maintenance Tips
Regular Inspections
Check for Leaks: Periodically check under the sink for any signs of water leakage.
Inspect P-Trap: Ensure the P-trap is free of debris and functioning properly.
Clean the Strainer
Remove Debris: Regularly remove any debris caught in the sink strainer to prevent clogs.
Use Boiling Water: Pour boiling water down the drain once a week to help clear any buildup.
Avoid Chemical Cleaners
Use Natural Solutions: Opt for natural drain cleaning solutions, such as a mixture of baking soda and vinegar, to avoid damaging the plumbing.
Troubleshooting Common Issues
Slow Drainage
Check for Clogs: If water is draining slowly, check the strainer and P-trap for clogs and remove any debris.
Use a Plunger: A plunger can help dislodge minor clogs in the drain.
Persistent Leaks
Tighten Connections: Recheck all connections and tighten any that are loose.
Reapply Sealants: Apply additional plumber’s putty or Teflon tape to seal any persistent leaks.
Unpleasant Odors
Clean P-Trap: Remove and clean the P-trap to eliminate any trapped debris causing odors.
Flush with Vinegar: Pour a mixture of vinegar and water down the drain to neutralize odors.
 Conclusion
Installing a kitchen sink drain might seem intimidating, but with proper preparation and a systematic approach, it can be a manageable DIY project. Understanding the components involved, using the right tools and materials, and following a step-by-step guide will ensure a successful installation. Regular maintenance and periodic inspections will help keep your kitchen sink drain functioning smoothly. By following this comprehensive guide, you can install a kitchen sink drain confidently and efficiently.