Introduction
How to install a kitchen sink – Installing a kitchen sink can seem daunting, but with the right tools and a bit of patience, it is a manageable DIY project. This guide will walk you through each step of the installation process, ensuring that your new sink looks great and functions well.
Preparing for Installation
Proper preparation is key to a successful kitchen sink installation. Before you start, gather the right tools and materials.
Tools and Materials Required
To install a kitchen sink efficiently, you’ll need specific tools and materials. These include:
- A tubing cutter for cutting pipes
- A jigsaw to cut the countertop
- A drill/driver and screwdriver for fittings
- Pliers and an adjustable wrench for connecting components
- A tape measure for accurate measurements
- Hacksaw and utility knife for trimmings
- A straightedge for marking cut lines
- A spade bit for starting cuts in the countertop
Make sure to have all these tools on hand to avoid delays during the installation process.
Removing an Existing Sink (if applicable)
If you’re replacing an old sink, you must first remove it. Shut off the water supply, disconnect the supply lines, and remove the drainage assembly. Use your tools to loosen and lift out the old sink. Clean the area thoroughly before proceeding with the new installation.
Measuring and Marking the Sink Layout
When starting your kitchen sink installation, precise measurement and marking are crucial. Here’s how to ensure accuracy for a perfect fit:
- Find the Center: Measure the counter’s back edge to identify the sink’s center. Make a mark for reference.
- Use the Template: If your sink comes with a template, align it with your central mark. Ensure the template’s back is 1.5 inches from the counter’s back edge.
- Outline the Sink: Trace around the template or the sink itself if no template is available. Be meticulous to get the right size and shape.
- Mark Cut Lines: Measure the sink lip, subtract 1/8 inch, and mark inside the outline. Use a straightedge to connect these marks.
- Check twice: Before you cut, double-check the measurements and marks to avoid mistakes.
Remember to keep your marks parallel to the counter’s edge for a clean, professional look. Once your layout is accurately marked, you’re ready for the next step: cutting the sink opening.
Cutting the Sink Opening
After measuring and outlining your sink layout, the next step is cutting the opening.
- Drill Starting Holes: Use a spade bit, preferably wider than your jigsaw blade, to drill a hole at each marked corner.
- Prepare Support: Place a wooden scrap across the cutout area to support the waste piece during cutting. This helps prevent damage to the countertop.
- Begin the Cut: Insert the jigsaw blade into a drilled hole and saw carefully along the cut lines. Keep the blade straight for a crisp edge.
- Finalize the Cut: Continue cutting around the outline and extract the waste piece. Double-check the opening against the sink size and adjust if necessary.
- Trial Fit: Place the sink into the new opening to ensure it fits well. If the sink doesn’t fit, carefully trim the opening until you achieve the perfect fit.
Taking your time during this phase is crucial for a flush and secure fitting of your new kitchen sink. Remember to wear safety gear, like goggles and gloves, to protect yourself during the cutting process.
Installing the Faucet and Other Sink Components
Once you’ve cut the opening, it’s time to install the faucet and other components. Follow these steps:
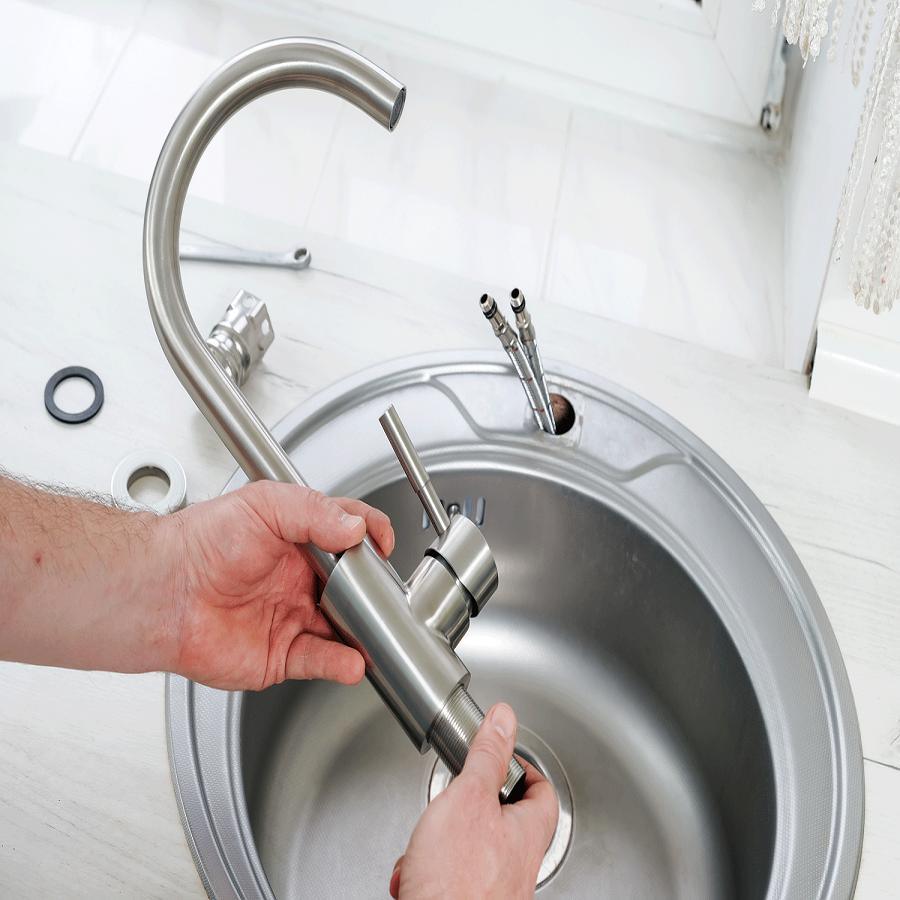
- Faucet Installation: Place the sink upside down on a soft surface. Insert the faucet supply tubing and tailpiece into the holes on the sink. Secure them with the provided mounting nuts and washers.
- Mounting Nut Tightening: Tighten the mounting nuts enough to hold the faucet in place. Ensure that the faucet can rotate fully without obstruction.
- Other Components: Attach any additional components, such as a soap dispenser, following the manufacturer’s instructions. Make sure to align these accessories with the faucet for a cohesive look.
Installing the faucet and other components correctly is key to a functional and aesthetically pleasing kitchen sink. Handle the parts with care to prevent damage and ensure a snug fit. After this step, you will move on to securing the strainer and drain assembly.
Securing the Strainer and Drain
The success of your kitchen sink installation ties directly to the attention given to the details. Here is the step-by-step process to secure the strainer and drain in place:
- Apply Plumber’s Putty: Roll a bead of plumber’s putty under the lip of the strainer. This helps create a watertight seal.
- Insert the Strainer: Press the strainer firmly into the sink’s drain hole from the top side.
- Install from Below: On the underside, slide on the gasket followed by the washer. If there’s a housing, put that on next.
- Thread the Locknut: Coat the threads with pipe-joint compound for a secure fit. Hand-tighten the locknut on the strainer and finish tightening with pliers.
- Attach the Tailpiece: Connect the sink-drain tailpiece to the strainer, using the gasket and slip nut provided.
These steps will ensure your sink strainer and drain are anchored securely, preventing future leaks and hassle. Pay careful attention to each connection point and make adjustments as needed for a perfect fit.
Placing the Sink and Sealing with Caulk
Installing the sink correctly is crucial for a watertight seal. Here’s how to place and seal your kitchen sink:
- Clean the Countertop: Wipe the area around the cut-out. Make sure it’s free from debris.
- Apply Caulk: With the sink upside down, put a steady bead of silicone caulk around the sink’s lip edge.
- Set the Sink: Carefully lower the sink into the cut-out. Make sure it aligns correctly.
- Press Down: Firmly press the sink to bond with the caulk. Check that the sink’s front is parallel to the countertop edge.
- Install Clips: If your sink has mounting clips, attach them now as directed.
- Wipe Excess Caulk: Use a damp cloth to clean any caulk that oozes out from the edges.
- Let Caulk Cure: Allow the sealant to dry as per the instructions before you move on to the next step.
Ensuring a watertight seal around the sink is essential to prevent leaks and water damage. Take your time with this step for the best results.
Connecting the Water Supply
Once your kitchen sink is properly secured, the next step is to connect the water supply. This is a crucial part of how to install a kitchen sink and requires precise work to ensure no leaks occur. Follow these instructions carefully:
- Attach Supply Lines: Connect flexible supply lines from the faucet’s tailpieces to the water supply valves. Make sure you match the hot and cold lines correctly.
- Secure Connections: Tighten all connections with an adjustable wrench. Be cautious to not overtighten, as this can damage the fittings.
- Install Shut-off Valves: If not already present, install new shut-off valves. These allow you to control water flow to the sink without affecting the entire home’s water supply.
- Check for Sprayers: If your sink has a separate sprayer, connect its hose to the faucet’s designated tailpiece.
- Test Supply Lines: Before proceeding, ensure that the supply lines are free from kinks and securely attached.
Connecting the water supply with care will prevent issues down the line and is essential for the proper function of your kitchen sink. After this step, you’ll move onto assembling the drain pipes, which is the next part of this kitchen sink installation guide.
Assembling and Installing the Drain Pipes
With your kitchen sink securely in place, it’s time to focus on the drain pipes assembly and installation:
- Prepare the Tailpiece: Begin by attaching the trap adapter to the sink’s drain tailpiece.
- Measure and Cut PVC Pipes: Measure the distance from the trap adapter to the P-trap and waste line. Cut PVC pipes to match these lengths.
- Dry Fit the Pipes: Temporarily connect the PVC pieces to ensure proper alignment and fit. Make adjustments as necessary.
- Disassemble and Prime: Take apart the dry-fitted pipes. Apply primer to all connections that will be glued.
- Glue the Pieces Together: Use PVC cement to join the pipes. Hold each joint for 30 seconds to ensure a strong bond.
- Reassemble Connections: Put all parts back together, hand-tightening the threaded connections to avoid leaks.
- Check Alignment: Ensure that the trap and tailpiece align correctly with the waste line. They should form a smooth path for water flow.
- Secure the Connections: Finally, re-tighten all connections to ensure they’re snug and leak-proof.
Completing these steps with attention to detail will help prevent future plumbing issues. And with this, you’re one step closer to finishing your kitchen sink installation.
Attaching the Dishwasher Drain (Optional) – how to install a kitchen sink
If you have a dishwasher, hooking it up to your new sink drain is the next step.
- Find the Drain Connection: Look on the sink tailpiece or the garbage disposal for the dishwasher drain inlet.
- Attach Drain Hose: Take your dishwasher drain hose and fit it over this inlet.
- Secure with a Clamp: Use a hose clamp to tighten the hose onto the inlet, preventing slippage.
- Form High Loop: Ensure the hose loops up high before connecting to prevent backflow of water.
- Fasten Securely: Check the hose is not kinked and fasten it firmly but do not overtighten.
Attaching the drain must be done well to avoid water damage from leaks. Follow these simple steps for a secure connection.
Checking for Leaks and Testing the Installation – how to install a kitchen sink
After assembling your kitchen sink and connecting water supply lines, checking for leaks is essential. Follow these steps:
- Remove the Aerator: Before testing water flow, take the aerator off the faucet. This avoids clogging with debris.
- Turn On Water Slowly: Open supply valves carefully to avoid pressure surges that might cause leaks.
- Inspect Connections: Watch the supply and drain lines for any wet spots indicating a leak.
- Tighten Leaks: If you spot a leak, gently tighten the connection. Small turns can stop the leak.
- Fill the Sink: To check for drainage issues, fill the sink with water and observe.
- Look for Puddles: Inspect under the sink for puddles, which suggest a leak in the seal or pipes.
- Run Appliances: If you attached a dishwasher, run it to check for leaks at the connection.
- Replace Aerator: Once all tests are clear, replace the aerator onto the faucet.
Testing the installation ensures everything works properly before regular use begins. Take the time to do it right.
 DIY Installation vs Hiring a Professional – how to install a kitchen sink
When it comes to installing a kitchen sink, you face a big decision. Do it yourself or hire a pro? Let’s break it down.
Doing It Yourself:
- Pros: Save on labor costs. Work on your own timeline. Learn a new skill.
- Cons: Risk of mistakes. May take more time, especially for beginners. Might need to buy special tools.
Hiring a Professional:
- Pros: Quick and efficient. Skilled in tricky installations. They deal with surprise issues.
- Cons: Higher cost. You depend on their schedule.
If you’re confident and equipped, a DIY approach can cut costs. Not confident? Connect with a skilled plumber. Aim for a balance between your skills, time, and budget.
For those with basic tools and a bit of know-how, a DIY installation is possible. First-timers should consider if the potential savings are worth the effort and risk.
Professionals ensure a correct and quick job. They can handle complex tasks like adding garbage disposals. Getting multiple quotes is a smart move to find a good deal.
Consider your situation carefully before deciding. And remember, either way, a high-quality sink can elevate your kitchen’s look.
Maintaining Your Newly Installed Kitchen Sink – how to install a kitchen sink
After installing your new kitchen sink, regular upkeep is essential. Here are simple steps to maintain it:
1. Avoid Harsh Chemicals: Steer clear of strong cleaners that can harm the sink’s surface.
2. Use Mild Soap: Wipe the sink regularly with a gentle soap and water mix to keep it clean.
3. Regular Cleaning: Commit to a routine of cleaning to prevent build-up and maintain shine.
4. Check the Aerator: Take out and rinse the aerator every few months for a steady water flow.
Keeping your kitchen sink in top condition ensures longevity and a spotless appearance. Stick to these maintenance tips for a sink that lasts and functions well.

