Getting Started with DIY Kitchen Cabinets
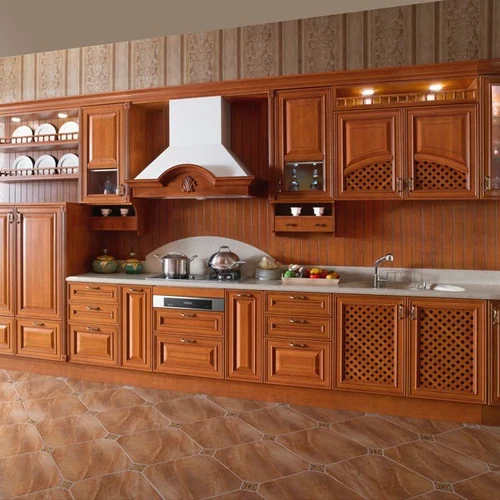
How to build kitchen cabinets free plans – Embarking on a DIY kitchen cabinet project? It’s a smart way to save money and add a personal touch to your space. Let’s get you started on the right foot by ensuring you measure your kitchen space correctly and understand the diverse cabinet types and styles available.

Measuring Your Kitchen Space Correctly
Measuring your kitchen is the first step and a crucial one. Start by measuring the walls. Note the dimensions. Think about the space your appliances take. This will tell you how much room you have for cabinets. Larger kitchens might need fewer, bigger cabinets. Smaller ones might benefit from more, but smaller cabinets. Remember, accurate measurements are the foundation of a well-fitted kitchen.
Understanding Different Cabinet Types and Styles
Now, let’s talk about cabinet types. You have base cabinets, which sit on the floor. Wall cabinets hang above countertops. Tall cabinets, often used as pantries, stretch from floor to ceiling. Style-wise, you could go modern with sleek lines or traditional with classic detailing. Choose a style that complements your kitchen’s look and feel. With the right plan and a little creativity, you’ll be on your way to a dream kitchen in no time.
Selecting the Right Materials
Choosing the right materials is crucial for your DIY kitchen cabinet project. Let’s dive into the essential materials you’ll need, focusing first on the type of wood.
Choosing the Best Wood for Your Cabinets
When selecting wood for your cabinets, consider durability, cost, and appearance. Popular choices include:
- Maple: Strong and with a uniform texture, it paints well.
- Oak: Highly durable and features a pronounced grain pattern, ideal for traditional styles.
- Walnut: Offers a rich color and fine texture, perfect for luxurious designs.
- Cherry: Known for its smooth grain and reddens over time, adding character.
- Alder: Less costly, easy to work with, and stains well, mimicking more expensive woods.
These woods not only vary in cost but also in how they complement your kitchen’s design. Choose one that aligns with your budget and aesthetic preference.
Necessary Tools and Hardware for Cabinet Making
To build your cabinets, you will need specific tools and hardware:
- Measuring Tape and Level: For precise measurements and alignment.
- Saw: A table saw or circular saw for cutting wood.
- Drill: For assembling parts and attaching hardware.
- Screws and Hinges: Essential for constructing and hanging doors.
- Wood Glue: Provides additional strength to joints.
- Sandpaper: For smoothing edges and surfaces before finishing.
- Paint or Stain: To finish your cabinets with color or wood enhancement.
Gathering these tools and materials will set the foundation for your DIY kitchen cabinet project, allowing smooth execution of your plans.
Planning Cabinet Placement
Planning where to place your cabinets is key to a well-functioning kitchen. Let’s talk about how to maximize storage and consider design for specific areas.
Maximizing Storage with Strategic Cabinet Layouts
To make the most of your space, plan your cabinet layout carefully. Think about your kitchen’s workflow. Place items you use often in easy-to-reach spots. Use corner spaces well with lazy Susans or pull-out drawers. Cabinets should not interfere with appliances or their doors.
Consider adding cabinets above your refrigerator for extra storage. Use vertical dividers in tall cabinets for things like baking trays. Remember, the goal is to make everything accessible and to reduce clutter.
Design Considerations for Over-the-Sink and Refrigerator Cabinets
When planning cabinets over the sink, ensure they don’t hang too low. You need enough headspace. For cabinets above the fridge, make sure they’re deep enough. Fridge-top cabinets are great for items you don’t need daily.
For both spots, choose materials that handle moisture well. Use hardware that matches your kitchen’s style. If you have a big kitchen, consider leaving space above the sink open. This can make the room feel bigger and you might add some decor or plants.
Think about lighting too. Under-cabinet lights can illuminate your work areas nicely. With careful planning, your cabinet placement will make your kitchen both more attractive and more practical.
Free DIY Plans for Various Cabinet Types
Embarking on a DIY project to build kitchen cabinets can be exciting and rewarding. Access to the right plans can make all the difference. Here are some free plans to consider for different types of cabinets to fit your needs and style.
Base Cabinets and Drawer Bases
For sturdy base cabinets and comprehensive drawer bases, look no further. Ana White offers clear, easy-to-follow plans that are perfect for beginners. These plans demonstrate the construction of the base and guide you through crafting functional drawers using basic tools.
Standard and Corner Wall Cabinets
Maximize your kitchen space with plans for standard and corner wall cabinets. Ana White comes to the rescue once again. Her plans make use of the often underutilized corner space, providing extra storage with style. The step-by-step guides ensure accurate assembly, even for less experienced DIY enthusiasts.
Specialized Cabinets like Fridge Enclosure and Above-Cabinet Shelves
Specialized cabinets can enhance the functionality of your kitchen immensely. Young House Love shows you how to build a sleek cabinet enclosure for your fridge, integrating it seamlessly into your kitchen design. For those who wish to utilize every inch of space, Family Handyman’s above-cabinet shelves plan is a godsend, making the most of the space between your cabinets and ceiling.
Unique and Creative Cabinet Upgrades
Give your kitchen a fresh look with these unique cabinet ideas.
Transforming Cabinets with a Barn Wood Style
Barn wood style adds rustic charm to any kitchen. You can repurpose old wood for this upgrade. This style works without needing to build new cabinets. It also keeps costs down, blending old with new. Get creative by mixing textures and hues for a unique look.
Building Pull-Out Shelves for Convenience
Pull-out shelves enhance kitchen functionality. These shelves make it easy to access items at the back. No more digging through clutter! You can replace old shelves or add new pull-out ones. This project requires moderate DIY skills but offers massive storage improvement.
Utilizing Open Shelving and Crate Cabinets
Open shelving adds a minimalist touch to your kitchen. Use wooden crates for a cost-effective solution. It allows you to display items stylishly and within reach. Attach crates on walls or place on countertops. This easy project brings an earthy feel to your space.
Step-by-Step Guides for Cabinet Construction
A good DIY project needs a step-by-step guide. Here, we’ll look at how to tackle three key projects: base cabinets, up-to-ceiling and corner cabinets, and rollouts for lower cabinets.
Assembling and Installing Kitchen Base Cabinets
Start by gathering your tools and materials. You’ll need wood, screws, glue, and the right tools. Follow your plan’s cut list and assembly instructions. Be sure to check the fit in your actual kitchen space before installing. Once everything fits, secure the cabinets to the wall.
Crafting up-to-Ceiling and Corner Cabinets
For up-to-ceiling cabinets, measure ceiling height carefully. Cut wood to fit. Build a frame that reaches the top. Craft a box or case that fits the frame. Attach doors if needed. Corner cabinets may need special shapes. Measure angles and spaces well. Cut wood to fit these unique dimensions. Make sure all sides meet snugly before securing.
Adding Rollouts to Lower Cabinets
Rollouts boost storage and access. You’ll need slides, wood for the boxes, and a drill. Measure cabinet openings first. Build the rollout box to fit. Attach slides to the box and cabinet. Slide in the box. Check to make sure it pulls out smoothly.
Finishing Touches and Installation Tips
Once you’ve built your cabinets following the free DIY plans, it’s time for the finishing touches.
Applying the Paint and Adding the Hardware
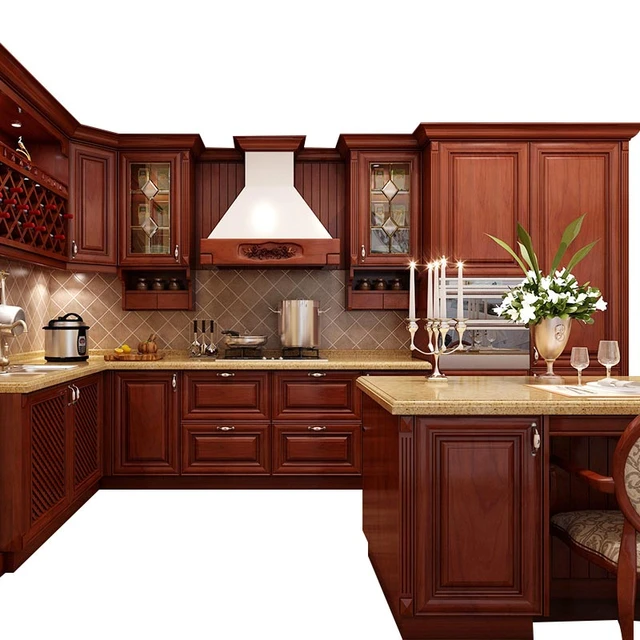 kitchen Apply evenly, allow it to dry, and add a second coat if needed. Then, attach handles or knobs for a complete look.
Aligning Doors and Ensuring Smooth Function
Hang the doors on your cabinets carefully. Make sure they align properly and open without issues. Adjust hinges as needed for a smooth swing.
Securing Cabinets Safely and Accurately
Secure your cabinets to the wall or floor. Use a level to ensure they’re straight. Fasten them firmly to avoid any movement and ensure long-lasting use.

