 Introduction:
A kitchen drying rack is an essential tool for air-drying dishes, utensils, and cookware after washing. It provides a convenient and organized space for items to dry naturally, reducing the need for hand-drying and minimizing the risk of bacteria growth. In this comprehensive guide, we will explore the different types, materials, and features of kitchen drying racks. From countertop options to wall-mounted and collapsible racks, we will cover everything you need to know about choosing the perfect drying rack for your kitchen.
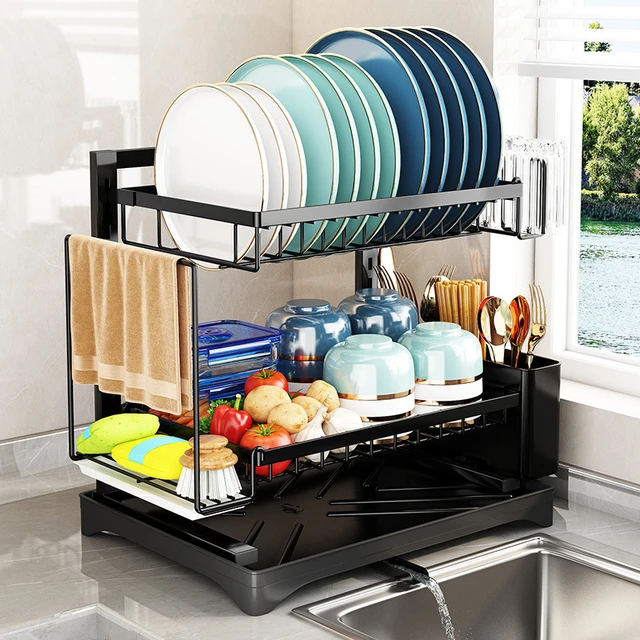
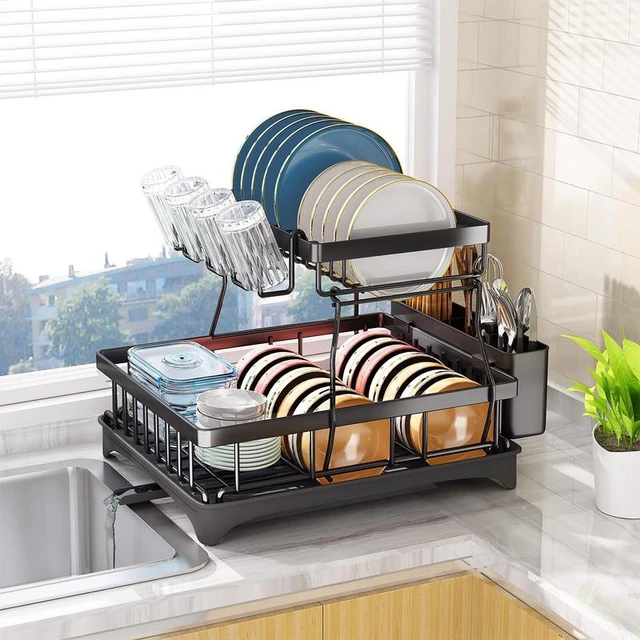
Countertop Drying Racks:
Materials:
Countertop drying racks are commonly made from stainless steel, plastic, or bamboo.
Stainless steel offers durability and rust resistance, while plastic and bamboo options are lightweight and eco-friendly.
Features:
Countertop drying racks often have multiple tiers or levels to accommodate dishes, bowls, and glassware.
They may include additional compartments for utensils or detachable drying mats for extra absorbency.
Benefits:
Countertop drying racks provide easy access to drying items and can be easily moved or stored when not in use.
They offer efficient drying by allowing airflow around dishes, preventing water buildup and promoting faster drying times.
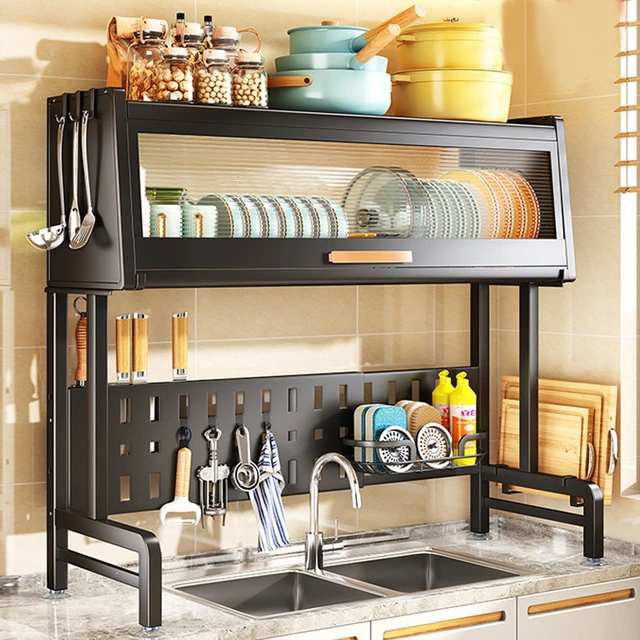
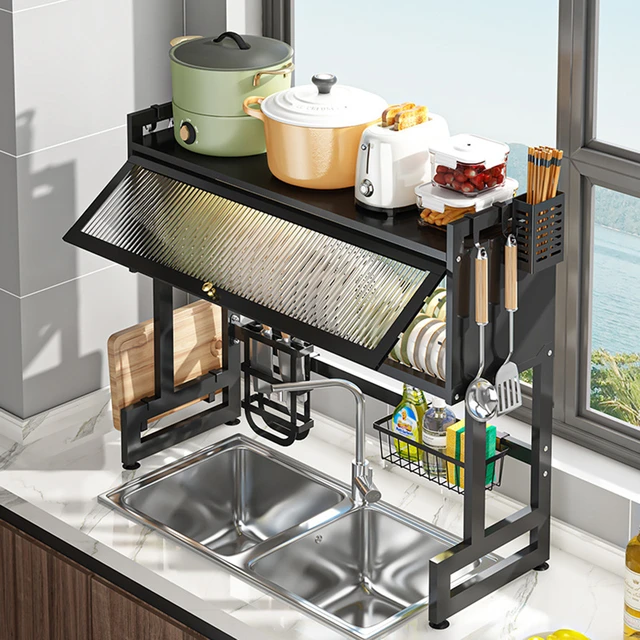
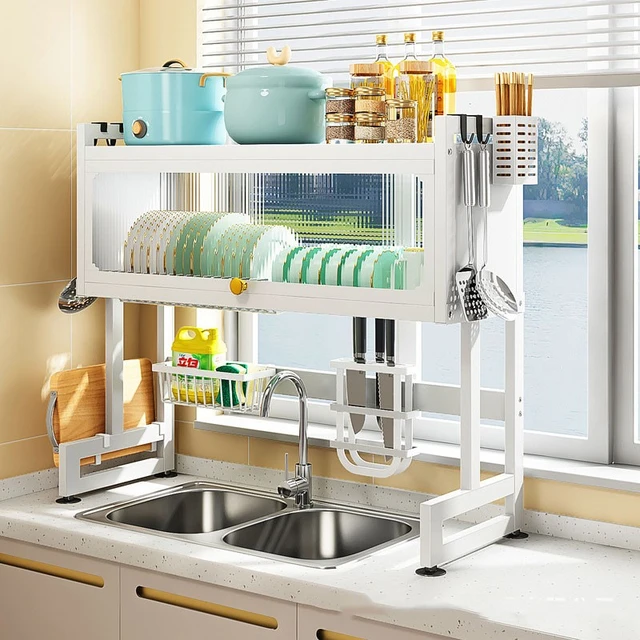
Wall-Mounted Drying Racks:
Materials:
Wall-mounted drying racks are typically made from stainless steel, aluminum, or chrome-plated steel.
These materials provide sturdy support and resistance to rust or corrosion.
Features:
Wall-mounted drying racks come in various sizes and designs, ranging from compact fold-down racks to larger, expandable options.
Some models have retractable or foldable arms, allowing for customization based on drying needs.
Benefits:
Wall-mounted drying racks utilize vertical space, making them a great solution for smaller kitchens with limited countertop space.
They keep the drying area clear and free up countertop space for other tasks.
Collapsible Drying Racks:
Materials:
Collapsible drying racks are commonly made from stainless steel or plastic.
Stainless steel options offer durability, while plastic racks are lightweight and easy to store.
Features:
Collapsible kitchen drying rack have foldable or expandable designs, allowing for easy storage when not in use.
Some models include additional features such as removable drying trays or compartments.
Benefits:
Collapsible drying racks are ideal for kitchens with limited space, as they can be easily folded and stored away when not needed.
They are portable, making them suitable for camping trips or small living spaces where space is at a premium.
Care and Maintenance:
Cleaning:
Regularly clean the drying rack to prevent the buildup of dirt, food particles, or mold.
Use mild soap and water, or follow the manufacturer’s instructions for specific cleaning recommendations.
Drying Area:
Ensure the drying area is clean and dry before placing items on the rack to avoid cross-contamination or odor transfer.
Storage:
Store the drying rack in a clean and dry area when not in use to prevent rust or damage.
For collapsible racks, fold or collapse according to the manufacturer’s instructions to maintain their functionality.
Cleaning a kitchen drying rack is relatively simple and can be done using the following steps:
Empty and Disassemble:
Remove all dishes, utensils, and any other items from the drying rack. If your drying rack is collapsible or has removable parts, disassemble it to clean each component separately.
Rinse Off Debris:
Rinse the drying rack under running water to remove any food debris, residue, or loose particles. Use a gentle stream of water or a sprayer attachment to help dislodge stubborn dirt.
Soak in Soapy Water:
Fill a sink or basin with warm water and add a mild dish soap or a solution made with warm water and a few drops of liquid dish detergent. Submerge the components of the drying rack in the soapy water and let them soak for a few minutes. This will help loosen any remaining grime.
Scrub and Clean:
Using a soft-bristle brush, sponge, or cloth, scrub the kitchen drying rack components, paying attention to any areas with visible dirt or stains. Clean all surfaces, including the racks, trays, and holders. For hard-to-reach areas or crevices, use an old toothbrush or scrub brush to scrub away dirt.
Rinse Thoroughly:
After scrubbing, thoroughly rinse all the components of the drying rack with clean water to remove any soap residue or remaining debris. Make sure to rinse all surfaces, including the nooks and crannies.
Dry:
After rinsing, shake off excess water and allow the drying rack components to air dry completely before reassembling or using them again. Placing them in a well-ventilated area or near a window can help speed up the drying process.
Maintain Regularly:
To keep your drying rack clean and hygienic, it’s recommended to clean it regularly, especially if you notice any buildup or stains. Quick rinses after use and periodic deep cleaning will help prevent dirt and bacteria from accumulating.
Remember to consult the manufacturer’s instructions or care guidelines specific to your kitchen drying rack, as some racks may have specific cleaning recommendations or restrictions.
If you need to repair a kitchen drying rack, here are a few common issues and possible solutions:
Loose or Missing Parts:
If there are any loose or missing parts, such as screws, nuts, or connectors, check if they can be tightened or replaced. Look for spare parts or contact the manufacturer for assistance. If necessary, use appropriate tools, such as a screwdriver or pliers, to secure or replace the parts.
Rust or Corrosion:
If your drying rack has developed rust or corrosion, you can try removing it using a rust remover or a mixture of baking soda and water. Gently scrub the affected areas with a soft brush or cloth. Rinse thoroughly and dry the rack completely to prevent further rusting.
Broken or Cracked Components:
If any parts of the drying rack are broken or cracked, assess whether they can be repaired or replaced. Some materials, such as plastic or silicone, may be more prone to breakage. Consider using suitable adhesive or epoxy to repair minor cracks, or search for replacement parts if necessary.
Stability Issues:
If your drying rack wobbles or lacks stability, check if the legs or supports are properly aligned and secure. Adjust or tighten the connections as needed to improve stability. You can also add non-slip pads or rubber feet to the bottom of the rack to prevent sliding and improve stability.
Maintenance and Lubrication:
Regularly inspect the drying rack for any signs of wear or damage. Lubricate moving parts, such as hinges or folding mechanisms, with a silicone-based lubricant to ensure smooth operation and prevent sticking or squeaking.
Safety Considerations:
Prioritize safety when repairing a drying rack. If the damage is severe or compromises the stability or structural integrity of the rack, it may be best to replace it entirely to avoid any accidents or injuries.
If you are unsure how to repair or address a specific issue with your kitchen drying rack, it is recommended to consult the manufacturer’s instructions or seek professional assistance. They can provide guidance specific to your drying rack model or suggest appropriate repair solutions based on the issue at hand.
Conclusion:
A kitchen drying rack is a practical and efficient tool for air-drying dishes, utensils, and cookware. By understanding the different types, materials, and features outlined in this comprehensive guide, you can choose the perfect drying rack for your kitchen needs. Whether you opt for a countertop, wall-mounted, or collapsible rack, each type offers its own benefits in terms of space utilization and functionality. Remember to care for and maintain your drying rack to ensure its longevity and optimal performance. With the information provided, you can confidently select and utilize a drying rack that enhances convenience and organization in your kitchen.